Building a gaming PC can be a challenging but also rewarding task. In order to get your computer up and running, you must first understand how to wire it. This article will walk you through the required steps and provide some tips to ensure the process is as stress-free as possible.
The first step is to prepare the case for the wires. This includes removing any unnecessary hoses, cable ties, and screws, as well as ensuring all headers and ports are visible. You’ll also need to prepare any wire management or cable routing materials you plan to use, such as zip ties, cable clamps, and cord organizers.
Next, assemble the power supply and install it into the case. Ensure its connectors are plugged into the appropriate headers and ports. Insert the graphics card into the appropriate PCIe slot and attach its power cable. Connect the internal cables, such as the SATA, power, and USB. It’s important to plug the connectors into their intended ports to ensure your machine functions properly.
To mount the fans, screw them into the pre-drilled holes and verify their orientation. Ensure the fan blades are spinning in the proper direction, as indicated by the arrows. Secure the mounting screws and connect the cables for each fan.
It’s now time to begin the cabling process. Start by plugging the power supply’s main power cable into the wall outlet, then follow that connection with the 24-pin connector. Connect any additional power cables to their respective components, such as the 4-pin or 8-pin connectors for the CPU and GPU. Be sure to plug the CPU and GPU into their respective ports as well.
Run the data cables, such as USB, SATA, and audio cables. For the audio cable, connect it to both the motherboard and sound card. SATA data cables should be plugged into the back of the hard drive, optical drive, or SSD. Finally, insert USB cables into the appropriate ports.
The final step is to connect the front panel. This includes the power button, reset button, activity LEDs, speaker cable, USB ports, and other add-ons. Connect these components to the front panel header on the motherboard. Make sure your connections are secure and that everything is plugged in to the correct port.
Optimizing Your PC’s Cooling System
To ensure that your PC can perform at its best for as long as possible, you should optimize its cooling system. Start by taking note of air flow. Natural air flow tends to flow from the bottom of a case, so it’s best to install intake fans on the bottom and exhaust fans on the top. This will ensure the warm air from the inner workings of the machine can be expelled while cool air is drawn in.
Fan placement also matters. Ideally, the CPU’s fan should be installed directly on the processor rather than attached to a fan radiator or cooler. This will help to reduce temperatures and allow the fan to spin faster and move more air around the components.
Cooling Performance can be further improved with overclocking. Overclocking involves adjusting the processor’s core clock frequency, which can be done manually or through automated tools. This will allow the processor and other components to run faster and generate more heat, so it’s important to monitor the temperatures to make sure they aren’t too high.
Lastly, a liquid cooling system can be installed for more effective cooling. A liquid cooling system consists of several components, including a water block, pump, radiator, reservoir, and thermal paste. When properly installed, these components will ensure that even the most powerful systems remain cool and operate reliably.
Maximizing Cable Management
If you want to maximize your PC’s performance and aesthetic appeal, cable management is essential. Start by organizing all of the cables into groups and sorting them by type, such as data or power. This will make it easier to disconnect and reconnect them when necessary.
Next, you’ll want to pay attention to the cable lengths. Cut off any excess length, as this can cause clutter and create unnecessary restrictions on airflow. You may also want to use zip ties to bundle similar cables together, as this can help keep the airflow unimpeded.
You’ll also want to consider purchasing cable clamps to hold cables in place. These are especially useful for keeping wires secure on the backside of the PC, out of sight and out of the way. Additionally, you may want to look into specialized cord organizers, such as velcro straps, dust covers, and zippered sleeves.
Finally, consider using adhesive cable clips to attach the cables to the walls and sides of the case. This is a great way to ensure they stay out of the way and don’t interfere with airflow or other components.
How to Test Your System
To make sure your gaming PC is working properly, you’ll need to go through a few tests. Start by verifying that all the components are connected correctly, then check that the data cables are plugged into the motherboard properly. All the fans should be functioning, and the system should be free of any physical obstructions.
With that out of the way, start the machine and begin the testing process. The first step is to use diagnostic software to check for any hardware issues. This includes ensuring that all the drivers are up to date, as well as checking if any of the components are malfunctioning. Most modern component producers have their own diagnostic tools, but Windows and third-party programs can also be used to test performance.
Once the hardware has passed the tests, you can move on to the software side. Install and run the benchmarking software you intend to use to determine the specs of your machine. This will give you a good indication of how your gaming PC performs and provides a useful baseline for future comparisons.
Finally, you should stress-test the system under load. This can be done by running a game or streaming videos, as these activities will require the most processing power. Monitor the performance and take note of any issues that arise. If there are any significant issues, it’s best to check the wiring again to make sure everything is connected correctly.
Adding Extra Accessories
Now that your gaming PC is up and running, you may want to consider adding some extra accessories to maximize your experience. This may include items, such as a gaming monitor, sound system, gaming chair, and more.
Your monitor is an important component for any PC gaming setup, and you should look for one that can handle your PC’s maximum resolution. Some gaming monitors also have features such as G-Sync, which sync up the refresh rate of the monitor with the graphics card, and FreeSync, which helps to reduce screen tearing.
If you want to take your gaming experience to the next level, you may want to consider investing in a quality sound system. A good sound system can help to get the most out of your games and will also be beneficial for streaming and other activities. Many sound systems also come with additional features, such as surround sound and customizable equalizers.
You should also think about getting a gaming chair. This is not only comfortable, but it can also help to reduce strain on your body during long gaming sessions. Look for chairs that have adjustable features, such as armrests and adjustable height, as this will ensure you can find the perfect fit for your needs.
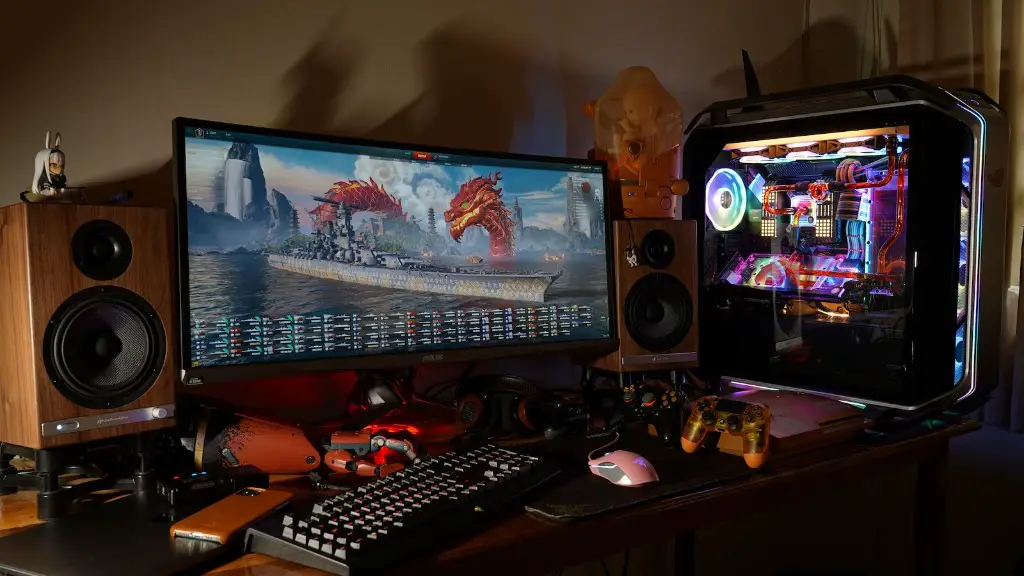
Finally, if you want to customize and improve your PC, you can add RGB lighting. This can range from subtle lighting for aesthetics to powerful lights for gaming performance. RGB lighting can perforated based on various input methods, such as audio, video, or voice commands. This can be a great way to take your gaming experience up a notch.


